How to Setup TeslaMate with Docker

In this article I am going to walk you through step by step on how to install and setup TeslaMate onto your Vultr Cloud Instance. From selecting your VM configuration to installing and configuring the tool onto your virtual machine. Looking for a guide on BuyVM? BuyVM Guide.
In this tutorial, I use Vultr because they have an ideal way of setting up a docker server with their preset image and getting started very quickly. I also like if you aren’t happy with TeslaMate you can easily destroy the cloud instance and go on with your day. However, see how far you can take it with the $100 in free credits (must use credits within 30 days)!
SSD VPS Servers, Cloud Servers and Cloud Hosting by Vultr
Easily deploy cloud servers, bare metal, and storage worldwide.
- Cloud Compute, Bare Metal, Dedicated Cloud, Kubernetes
- Receive $100 to test out the Vultr platform.
TeslaMate Features:
- Drive and charging reports
- Driving efficiency report
- Energy Consumption (net / gross)
- Charge Energy Added vs Energy Used
- Vampire Drain
- Projected 100% Range (Battery Degradation)
- Charging Stats
- Drive Stats
- History of Installed Updates
- See When Your Car Was Online or Asleep
- Lifetime Driving Map
- Visited Addresses
ALSO check the status of your car (inc. battery level) without waking your car up!
We will be following the developers advanced instructions due to the fact that we will be using a cloud instance, alternatively, you could install this on a Rasberry Pi or an extra computer you had lying around. I however like this option with Vultr due to being easy to re-produce for just about anyone.
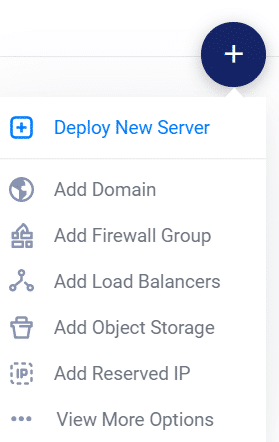
Deploy New Instance
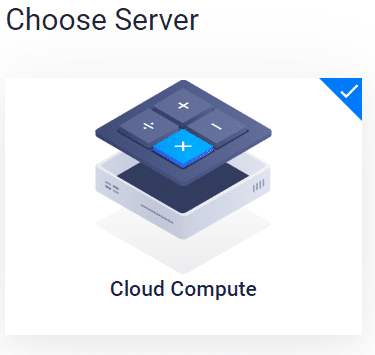
Choose Server: Cloud Compute
Server Location: Chicago (I selected Chicago but you can select whatever is best for you):
- Atlanta, USA
- New York (NJ), USA
- Chicago, USA
- Dallas, USA
- Los Angeles, USA
- Miami, USA
- Seattle, USA
- Silicon Valley, USA
- Toronto, CANADA
- Amsterdam, Netherlands
- Paris, France
- Frankfurt, Germany
- London, UK
- Tokyo, Japan
- Singapore, Singapore
- Sydney, Australia
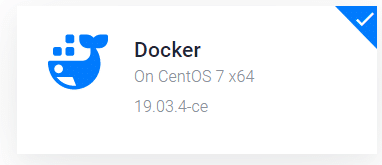
Server Type: Application: Docker: On CentOS 7 x64 19.03.4-ce
Server Size: 25 GB SSD
$5.00/mo OR $0.007/h
1 CPU
1024MB Memory*
1000GB Bandwidth
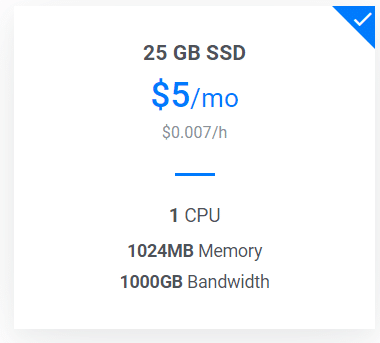
*Note: Docker requires a plan with at least 768MB of memory.
Click on Deploy Now!

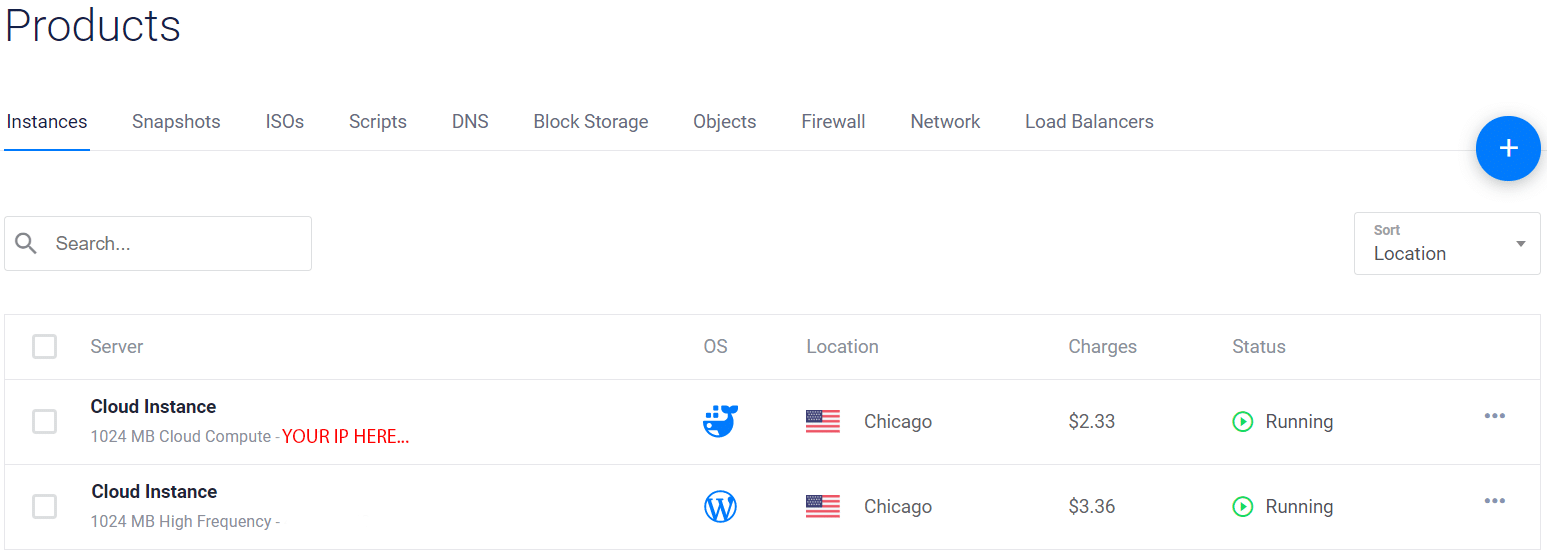
Click on Products!

Server Information

Download PuTTY
Enter the IP Address and click on Open!
GUIDE: Advanced Docker install (Traefik, Let’s Encrypt, HTTPS, HTTP Basic Auth)
sudo curl -L "https://github.com/docker/compose/releases/download/1.25.4/docker-compose-$(uname -s)-$(uname -m)" -o /usr/local/bin/docker-composesudo chmod +x /usr/local/bin/docker-composeSetup – docker-compose.yml
version: "3"

services:
  teslamate:
    image: teslamate/teslamate:latest
    restart: always
    depends_on:
      - database
    environment:
      - DATABASE_USER=${TM_DB_USER}
      - DATABASE_PASS=${TM_DB_PASS}
      - DATABASE_NAME=${TM_DB_NAME}
      - DATABASE_HOST=database
      - MQTT_HOST=mosquitto
      - VIRTUAL_HOST=${FQDN_TM}
      - CHECK_ORIGIN=true
      - TZ=${TM_TZ}
    volumes:
      - ./import:/opt/app/import
    labels:
      - "traefik.enable=true"
      - "traefik.port=4000"
      - "traefik.http.middlewares.redirect.redirectscheme.scheme=https"
      - "traefik.http.middlewares.teslamate-auth.basicauth.realm=teslamate"
      - "traefik.http.middlewares.teslamate-auth.basicauth.usersfile=/auth/.htpasswd"
      - "traefik.http.routers.teslamate-insecure.rule=Host(`${FQDN_TM}`)"
      - "traefik.http.routers.teslamate-insecure.middlewares=redirect"
      - "traefik.http.routers.teslamate-ws.rule=Host(`${FQDN_TM}`) && Path(`/live/websocket`)"
      - "traefik.http.routers.teslamate-ws.entrypoints=websecure"
      - "traefik.http.routers.teslamate-ws.tls"
      - "traefik.http.routers.teslamate.rule=Host(`${FQDN_TM}`)"
      - "traefik.http.routers.teslamate.middlewares=teslamate-auth"
      - "traefik.http.routers.teslamate.entrypoints=websecure"
      - "traefik.http.routers.teslamate.tls.certresolver=tmhttpchallenge"
    cap_drop:
      - all

  database:
    image: postgres:13
    restart: always
    environment:
      - POSTGRES_USER=${TM_DB_USER}
      - POSTGRES_PASSWORD=${TM_DB_PASS}
      - POSTGRES_DB=${TM_DB_NAME}
    volumes:
      - teslamate-db:/var/lib/postgresql/data

  grafana:
    image: teslamate/grafana:latest
    restart: always
    environment:
      - DATABASE_USER=${TM_DB_USER}
      - DATABASE_PASS=${TM_DB_PASS}
      - DATABASE_NAME=${TM_DB_NAME}
      - DATABASE_HOST=database
      - GRAFANA_PASSWD=${GRAFANA_PW}
      - GF_SECURITY_ADMIN_USER=${GRAFANA_USER}
      - GF_SECURITY_ADMIN_PASSWORD=${GRAFANA_PW}
      - GF_AUTH_ANONYMOUS_ENABLED=false
      - GF_SERVER_DOMAIN=${FQDN_TM}
      - GF_SERVER_ROOT_URL=%(protocol)s://%(domain)s/grafana
      - GF_SERVER_SERVE_FROM_SUB_PATH=true

    volumes:
      - teslamate-grafana-data:/var/lib/grafana
    labels:
      - "traefik.enable=true"
      - "traefik.port=3000"
      - "traefik.http.middlewares.redirect.redirectscheme.scheme=https"
      - "traefik.http.routers.grafana-insecure.rule=Host(`${FQDN_TM}`)"
      - "traefik.http.routers.grafana-insecure.middlewares=redirect"
      - "traefik.http.routers.grafana.rule=Path(`/grafana`) || PathPrefix(`/grafana/`)"
      - "traefik.http.routers.grafana.entrypoints=websecure"
      - "traefik.http.routers.grafana.tls.certresolver=tmhttpchallenge"

  mosquitto:
    image: eclipse-mosquitto:2
    restart: always
    command: mosquitto -c /mosquitto-no-auth.conf
    ports:
      - 127.0.0.1:1883:1883
    volumes:
      - mosquitto-conf:/mosquitto/config
      - mosquitto-data:/mosquitto/data

  proxy:
    image: traefik:v2.4
    restart: always
    command:
      - "--global.sendAnonymousUsage=false"
      - "--providers.docker"
      - "--providers.docker.exposedByDefault=false"
      - "--entrypoints.web.address=:80"
      - "--entrypoints.websecure.address=:443"
      - "--certificatesresolvers.tmhttpchallenge.acme.httpchallenge=true"
      - "--certificatesresolvers.tmhttpchallenge.acme.httpchallenge.entrypoint=web"
      - "--certificatesresolvers.tmhttpchallenge.acme.email=${LETSENCRYPT_EMAIL}"
      - "--certificatesresolvers.tmhttpchallenge.acme.storage=/etc/acme/acme.json"
    ports:
      - 80:80
      - 443:443
    volumes:
      - ./.htpasswd:/auth/.htpasswd
      - ./acme/:/etc/acme/
      - /var/run/docker.sock:/var/run/docker.sock:ro

volumes:
  teslamate-db:
  teslamate-grafana-data:
  mosquitto-conf:
  mosquitto-data:
Setup – .env
TM_DB_USER=teslamate
TM_DB_PASS=secret
TM_DB_NAME=teslamate

GRAFANA_USER=admin
GRAFANA_PW=admin

FQDN_TM=teslamate.example.com

TM_TZ=Europe/Berlin

[email protected]
Setup – .htpasswd
As per the documentation for TeslaMate. I recommend you use this tool to create your .htpasswd file:
http://www.htaccesstools.com/htpasswd-generator/
Enter your desired username, password and select Bcrypt (Apache v2.4 onwards)
In the example below, I entered username and password for these fields:
Example:
my:$2y$10$as5PEnYaoGEx2ebCFjdK0e9PBshAsvzIeAKijwNgeMSC9oJkDNo2.Now copy and paste this information into your .htpasswd file.
vi .htpasswd (or your favorite text editor)Make sure you set up your password before you start the Teslamate with Docker!
docker-compose upNote: You may need to run this command twice to get it work.
DNS Setup
You will need to point teslamate.example.com + grafana.exampe.com (your subdomain) to the IP Address provided to you by Vultr when you created your virtual server. This is done by contacting your web host or logging into your control panel to manage your DNS records and having these entries added.
Logging Into TeslaMate
- Open the web interface https://teslamate.example.com
Login with the details you entered into the .htpasswd file and then you will be prompted to log in with your Tesla Account. - Sign in with your Tesla account
- The Grafana dashboards are available at: https://grafana.example.com.
- Enter username:password:admin:admin first and you will be prompted to change the password on your first login.
I spent $0.01 or 1 penny to test out Teslamate. $0.02 to complete the tutorial.

You can change from Celcius to Fahrenheit and Kilometers to Miles in the settings.
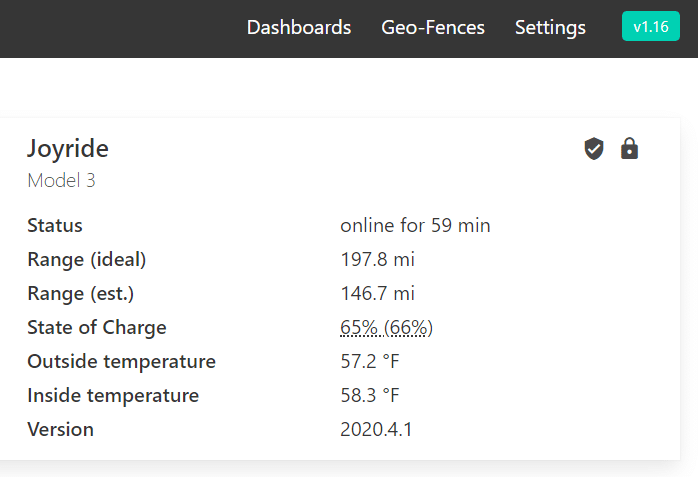
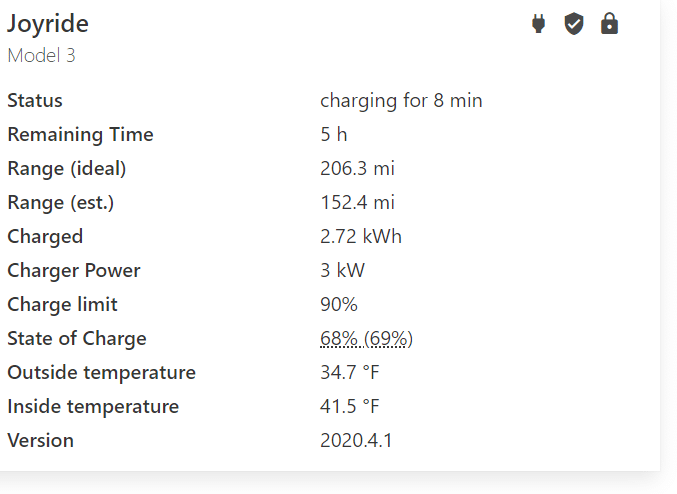
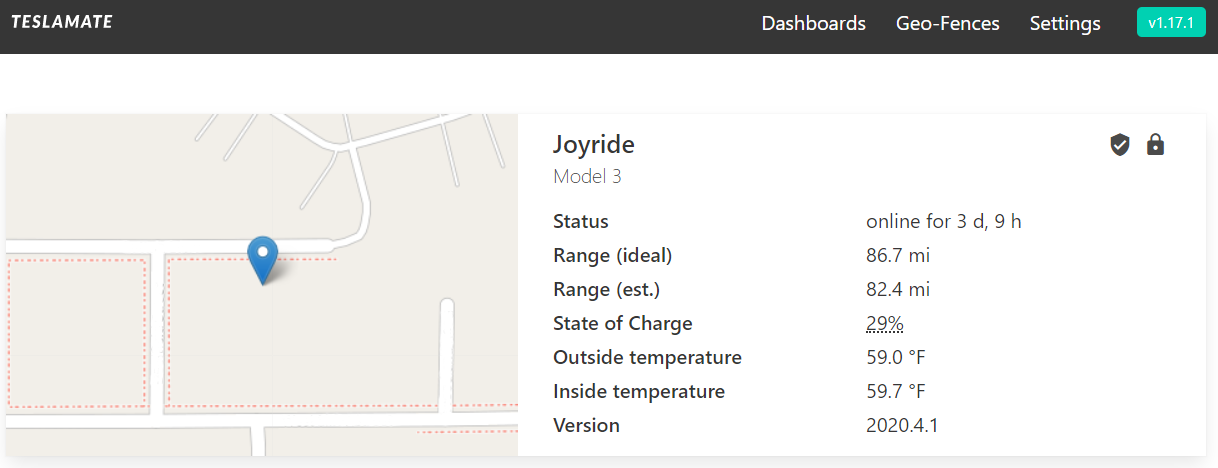
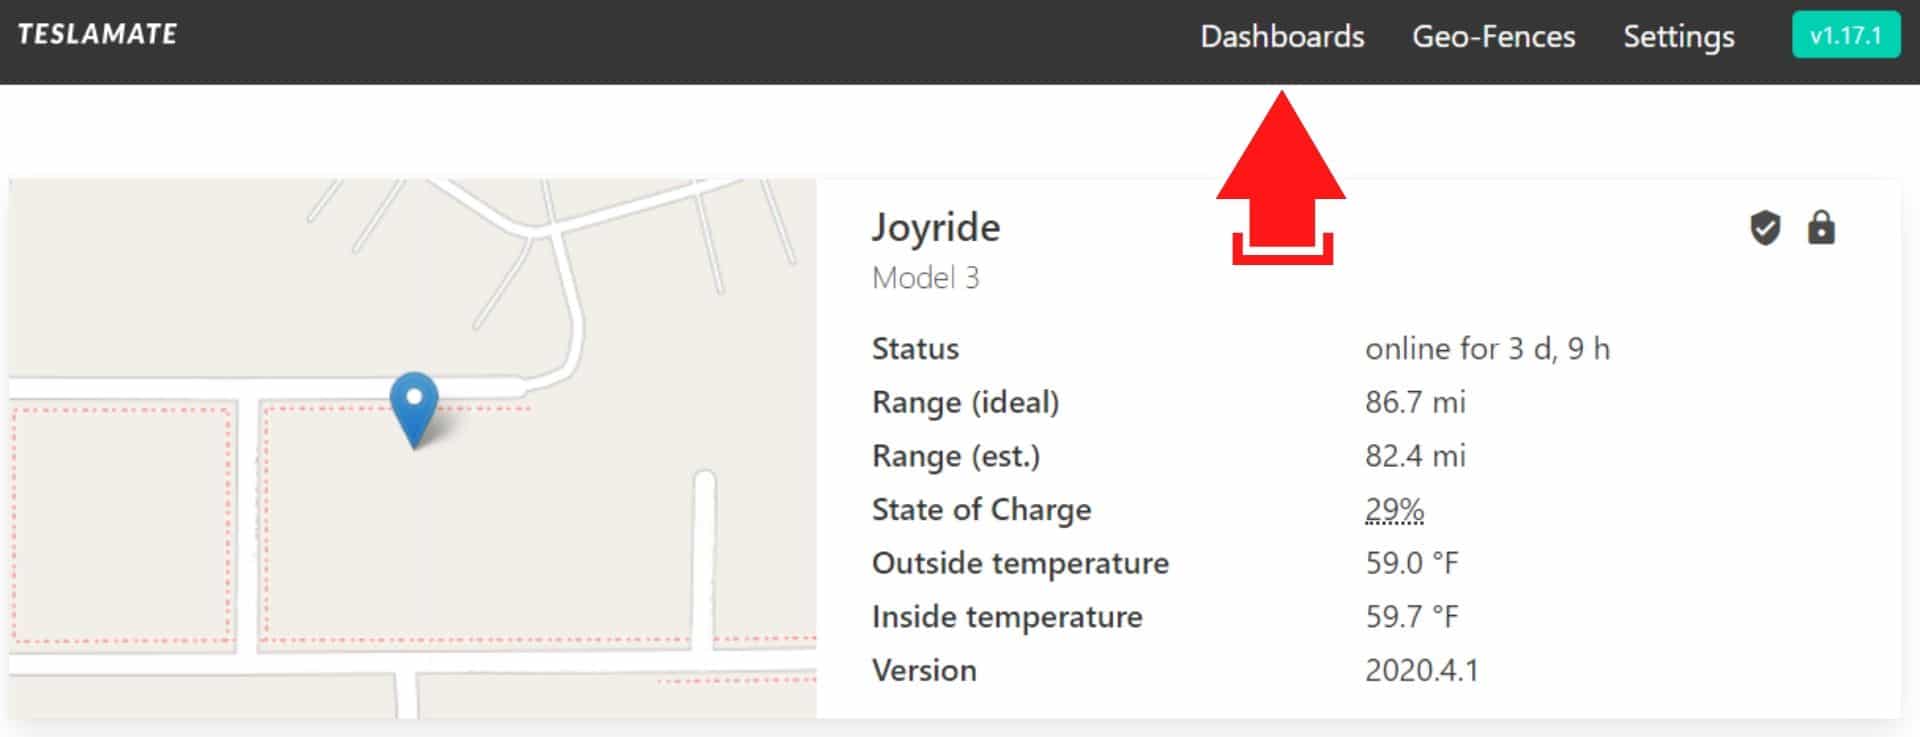
This is what the home screen looks like. You would also see a map with a pin on the location of your Tesla vehicle.
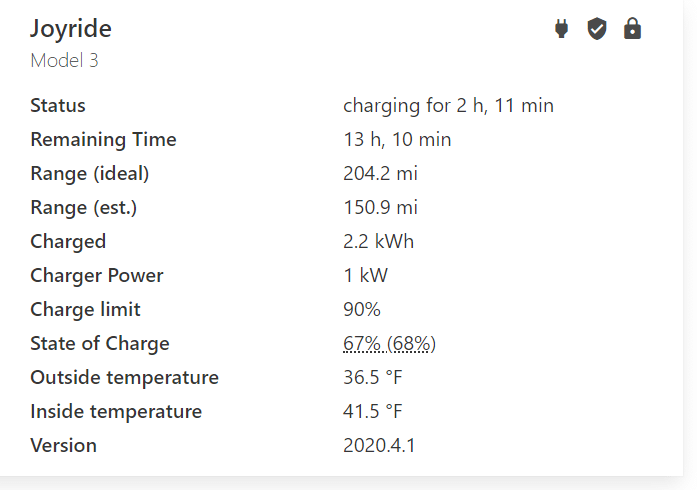
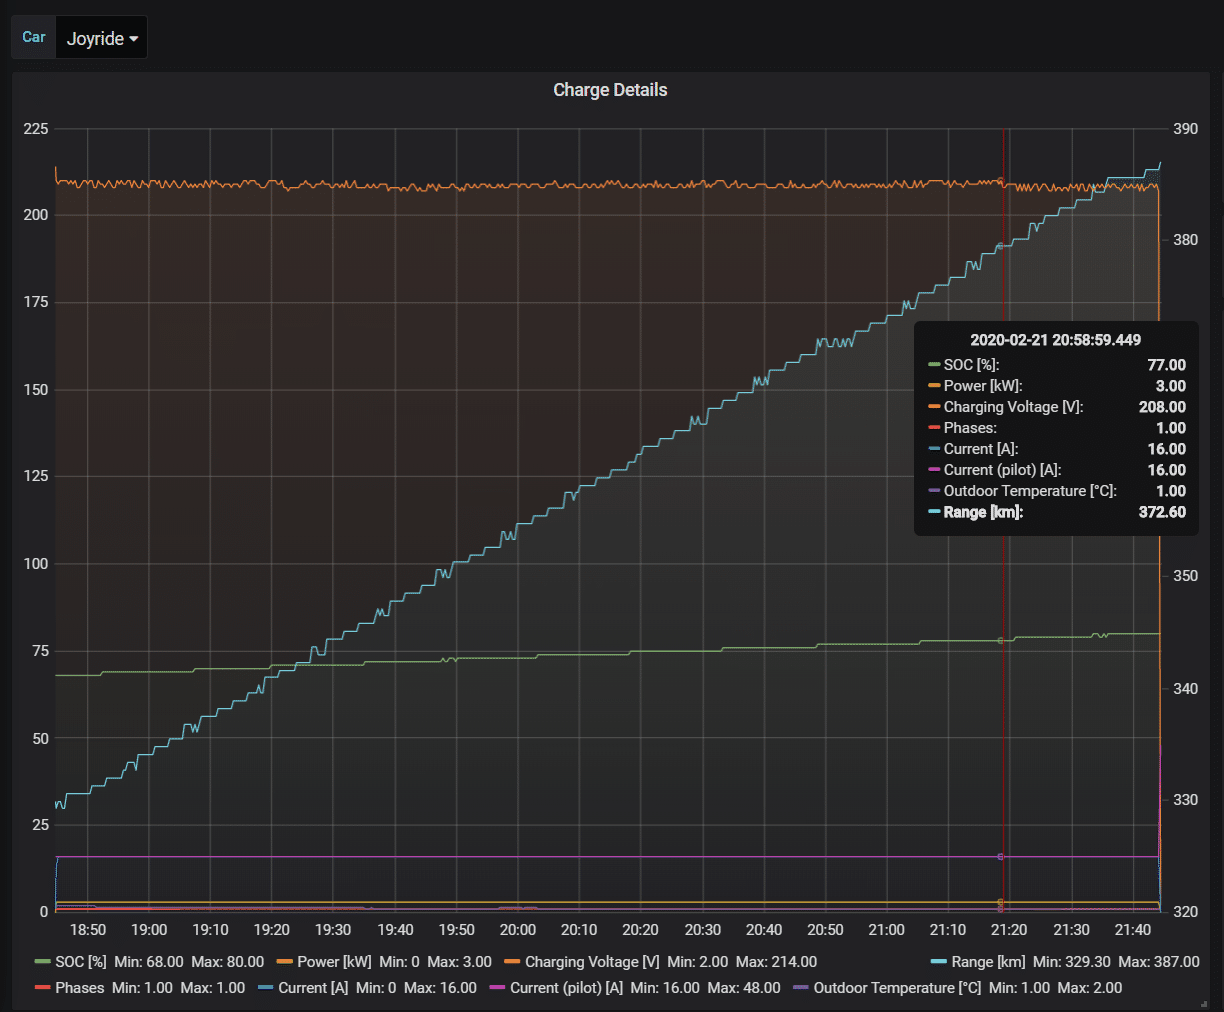
I went for a charge session at the closest regular 12a outlet to show what a charge session looks like with TeslaMate. Clean interface! 😀
March 10, 2020 Update
TeslaMate released an update to v1.17.1 about 16 days ago.
- Add Trip dashboard: This dashboard was built to visualize longer trips. It provides an overview of all drives and charges that were logged over a period of several hours or days.
- TeslaMate Release Page
I am excited to test out this new Trip dashboard added in the new release. This will be super helpful for Tesla road trips of course! 😃
This is the documentation I used to build portions of this tutorial:
https://docs.teslamate.org/docs/guides/traefik
https://docs.teslamate.org/docs/guides/portainer
March 21, 2020 Update
How to use the new trip feature apart of Teslamate:
- Open the web interface https://teslamate.example.com
- Dashboards => Tap or click on “Trip“
- Tap or click on “Today so far”
- Select preset from “Last 5 minutes“, all the way to “Last 5 years” or custom date range selection.
TeslaMate Home Screen
Tap or mouse over “Dashboards”
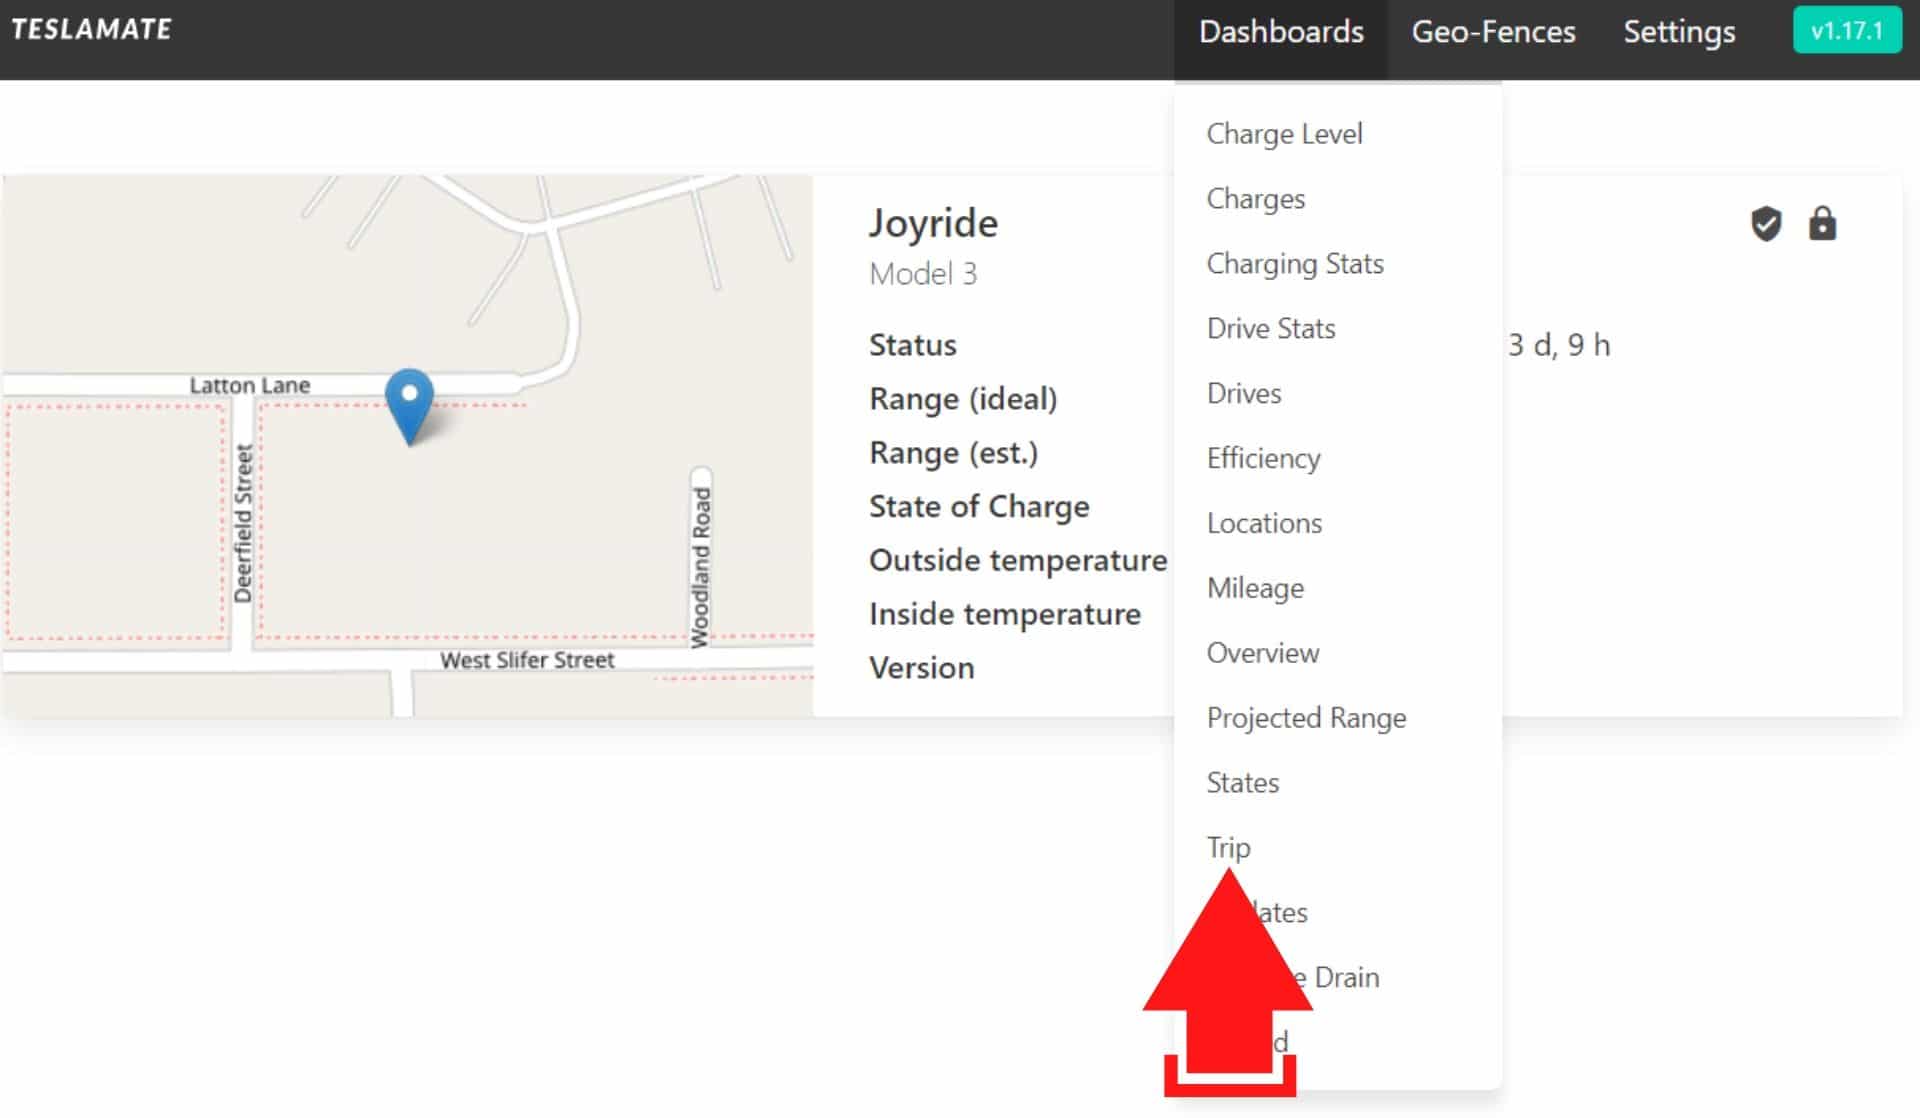
Tap or click on “Trip“
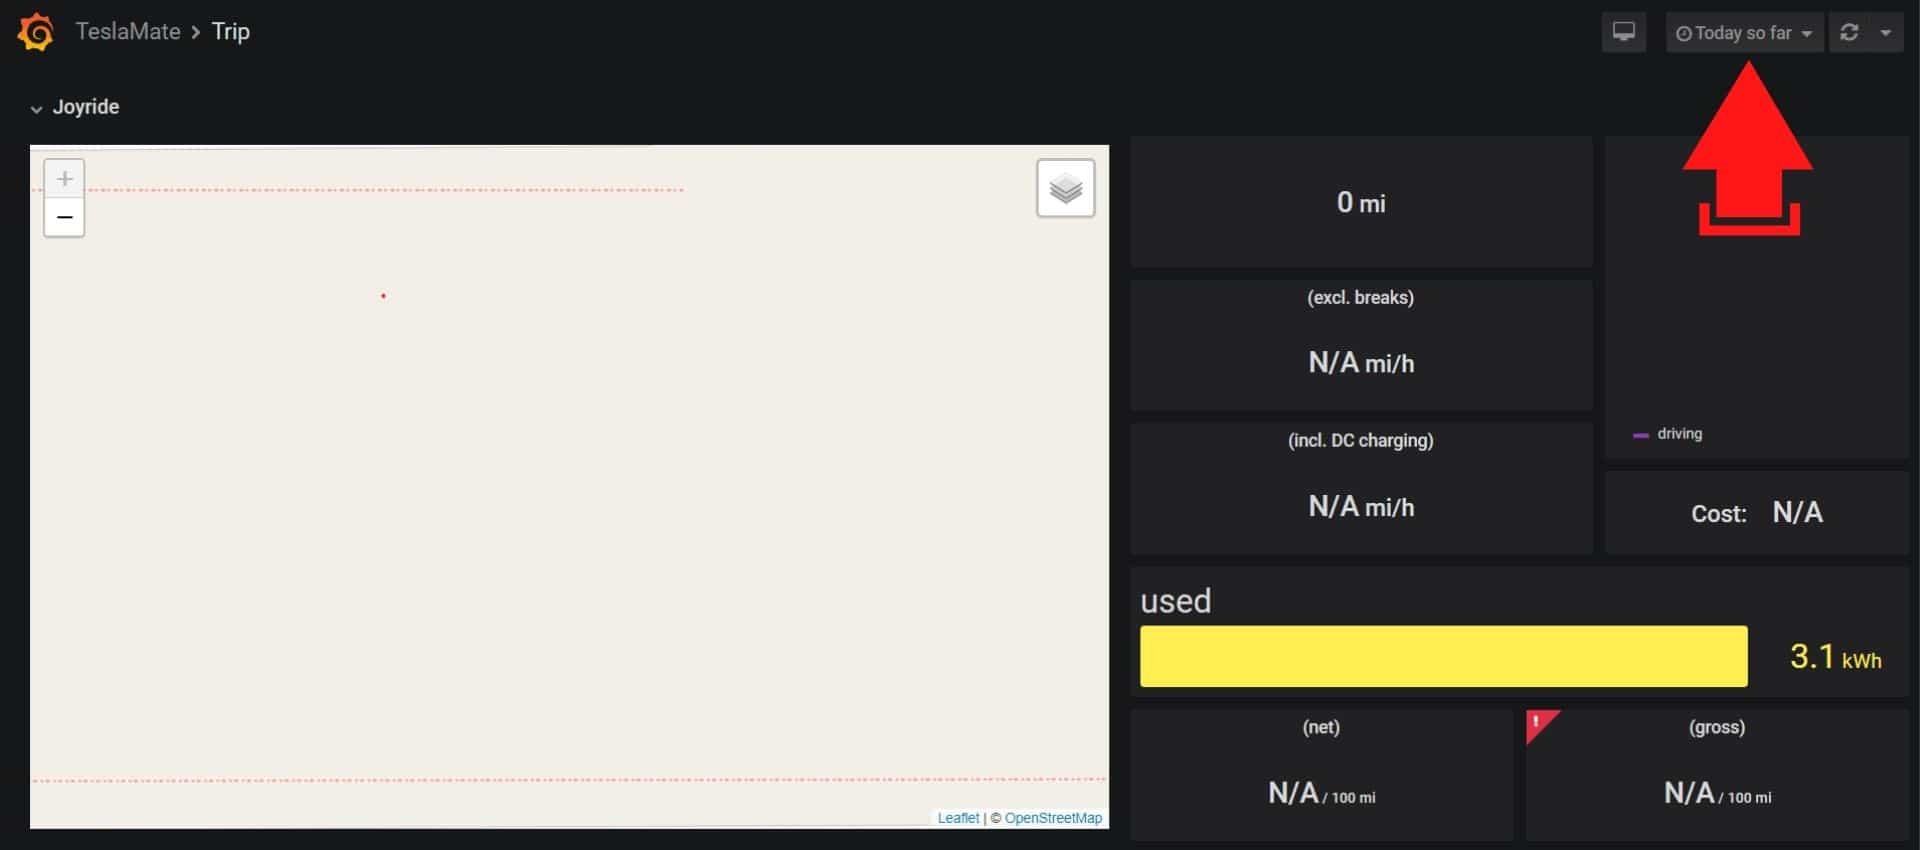
Select preset from “Last 5 minutes“, all the way to “Last 5 years” or custom date range selection.
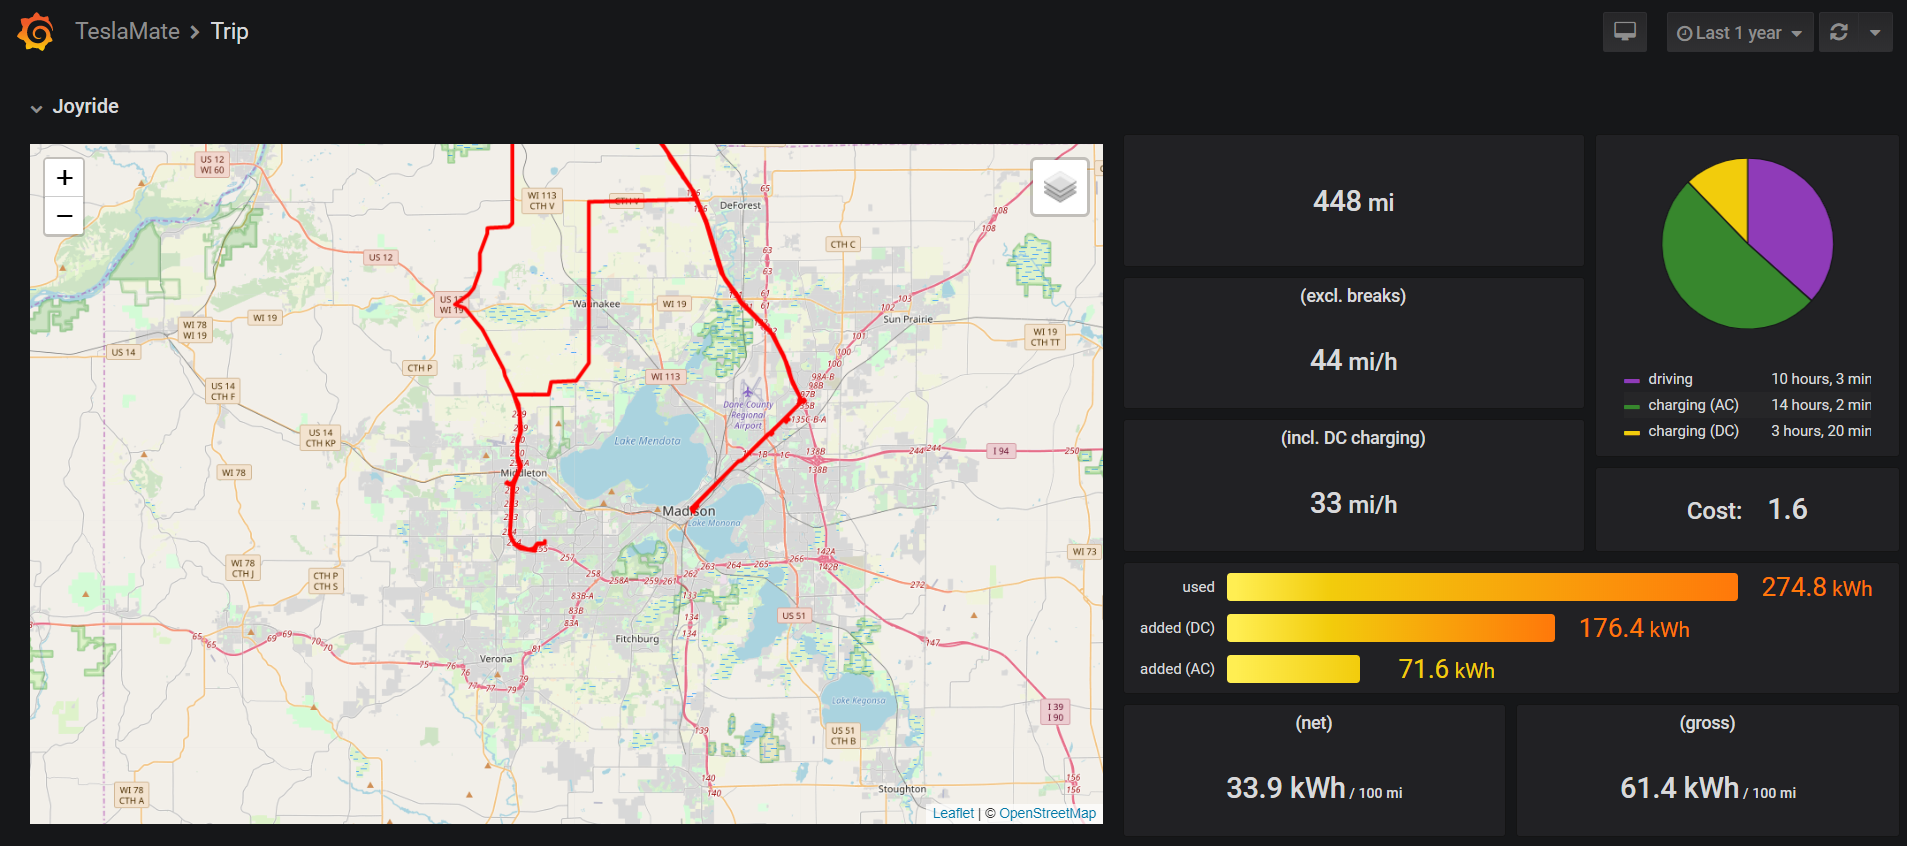
TeslaMate > Trip Example
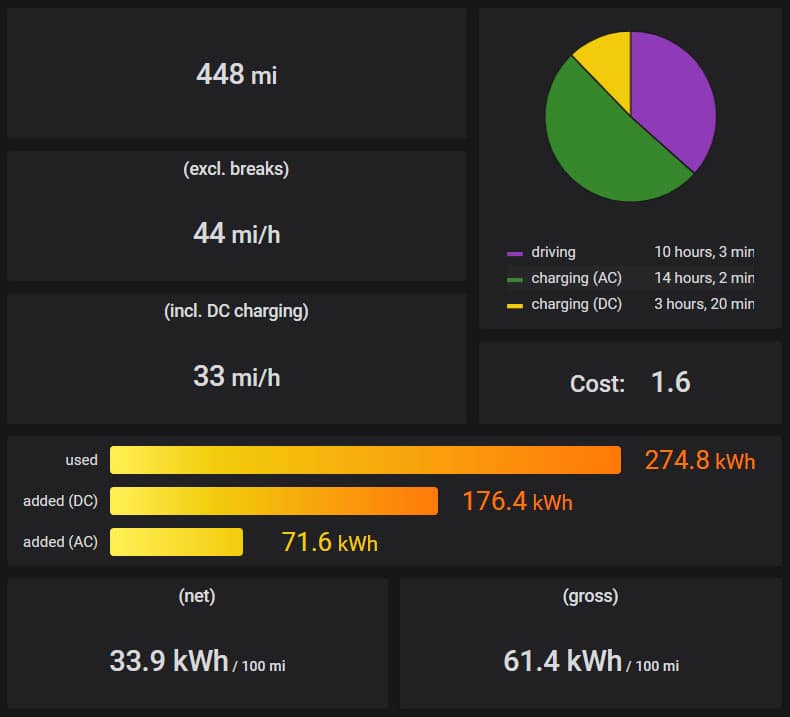
TeslaMate > Trip Example (Closeup)
I hope you found this setup guide helpful. 😃
SSD VPS Servers, Cloud Servers and Cloud Hosting by Vultr
Easily deploy cloud servers, bare metal, and storage worldwide.
- Cloud Compute, Bare Metal, Dedicated Cloud, Kubernetes
- Receive $100 to test out the Vultr platform.